How to Apply a Tapered Load to Plates in RISA-3D
It’s easy to apply tapered surface loads to plates in RISA-3D by stepping up the loads from one level to the next.

Try the Complete RISA Suite for
10 Days FREE

RISA Education

Video Library

Online Help

Get Support

About Us
When designing shear walls in RISA-3D, it’s common to add surface loads—whether to simulate lateral wind or seismic pressures, or even out-of-plane loads. But what happens when those loads intersect with openings in your wall panels?
Let’s walk through exactly how RISA-3D handles this scenario behind the scenes, including how the program preserves total force and moment equilibrium—even when wall geometry gets complex.

When a surface load is applied to a wall panel that contains openings, RISA-3D uses a special algorithm to redistribute the portion of the load that would otherwise fall inside the opening.
Rather than ignore that load entirely, the program converts the "lost" surface area into equivalent nodal forces along the edges of the opening. These loads are known as transient nodal loads.
Here’s the step-by-step breakdown:
Determine Centroid of the Loaded Region
RISA calculates the centroid of the area made up of both the surface load region and the opening.
Split the Load Across the Opening
The surface load over the opening is divided into two halves, based on the centroid location.
Distribute Equivalent Forces Along Opening Edges
These two portions of the load are then “smeared” as point loads along the nodes on the edge of the opening.
This ensures that both the total force and moment applied to the wall are preserved.
✅ Note: These loads are transient, meaning they’re only used during the analysis and are not visible by default. To display them, go to Model Display Options and check Include Transient WP Loads.
| Wall Panel with Opening and Applied Surface Load | Equivalent Nodal Loads on Opening Edge |
|---|---|
 |
 |
To verify that this method maintains equilibrium, you can try the following experiment in RISA-3D:
Create two identical wall panels:
One solid wall (no openings)
One with a door or window opening in the center
Apply the same surface load to both walls (e.g., uniform lateral pressure)
Solve and compare the reactions at the wall supports
You'll find that the sum of reactions is identical (within numerical rounding), even though the distribution of internal forces differs. This confirms that RISA-3D’s nodal redistribution method is force- and moment-conserving.
RISA-3D automatically redistributes surface loads that fall within wall openings as transient nodal loads
This ensures that the total force and moment acting on the wall are preserved
These nodal loads are automatically generated and not editable by the user
To view them, enable Include Transient WP Loads under Model Display Options-1.png?width=300&height=332&name=image%20(50)-1.png)
You can validate this behavior by comparing support reactions for walls with and without openings
🔗 For more, visit the Surface Loads at Openings Help Page
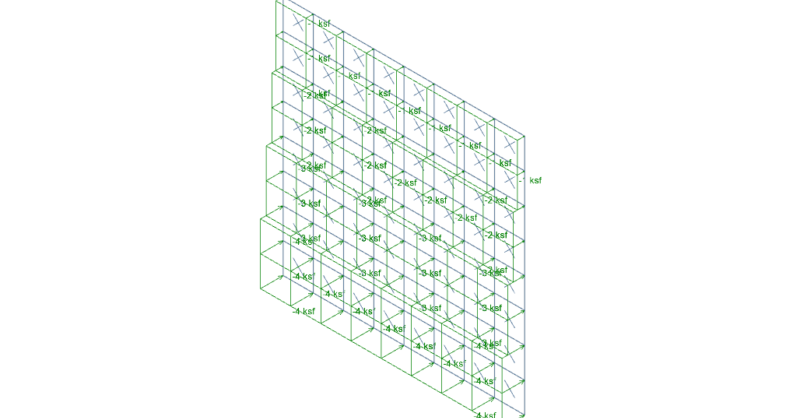
It’s easy to apply tapered surface loads to plates in RISA-3D by stepping up the loads from one level to the next.
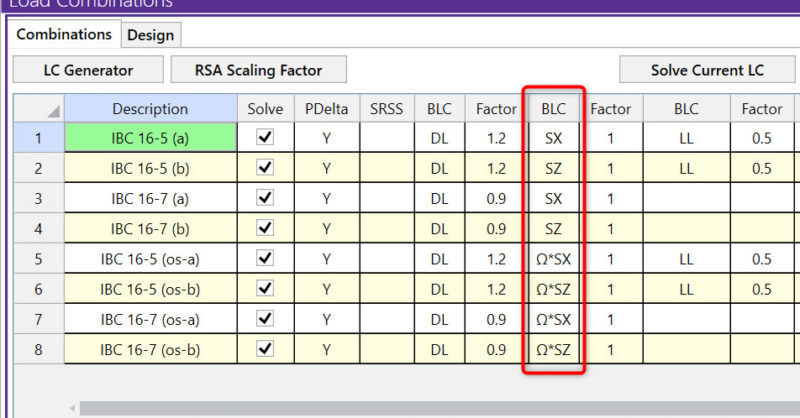
The Load Combination Generator in RISA-3D can now include earthquake loads in load combinations to reflect Response Spectra Analysis.
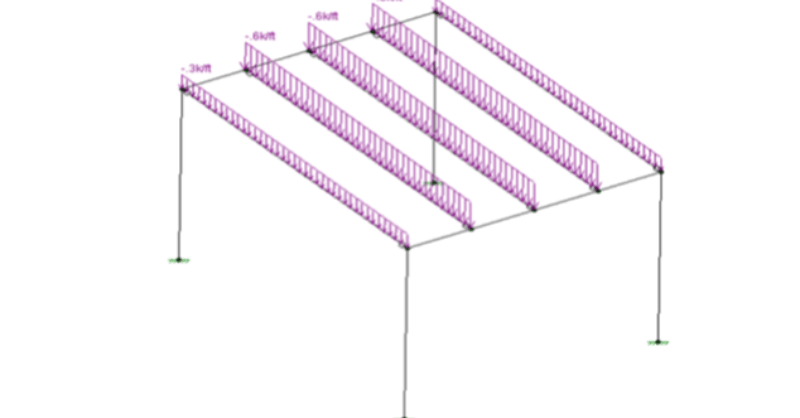
After solving a model with Member Area Loads, RISA-3D will automatically create Transient Basic Load Cases that allow the user to verify load...