How can I transition a Plate Mesh from Round to Rectangular?

How can I transition a Plate Mesh from Round to Rectangular?

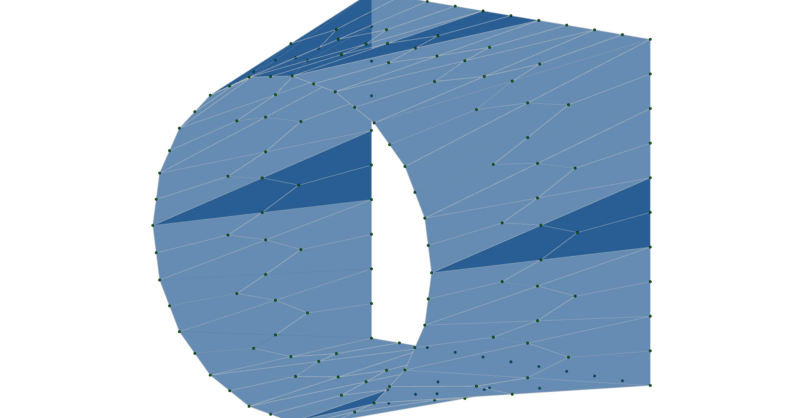
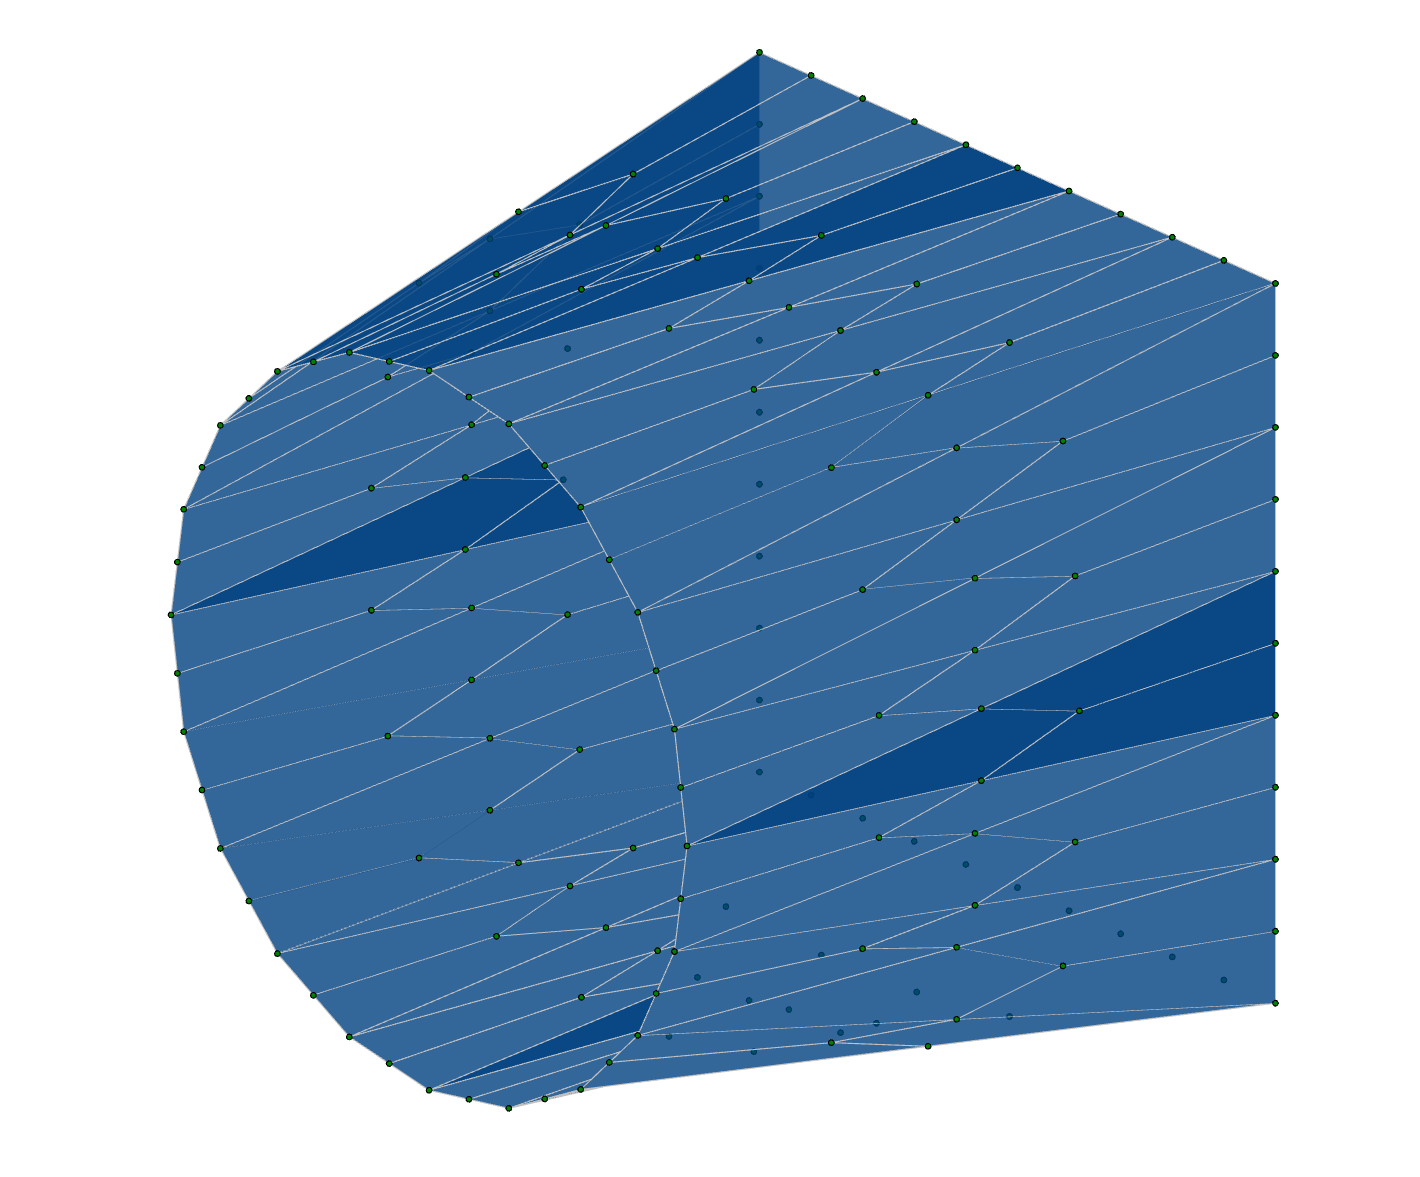
Transitioning plates from a circular (or elliptical) to a square (or rectangular) shape can be done easily using some of RISA-3D’s automated generation tools. Below is the procedure for transitioning a circle into a square, but it should be clear how this could be accomplished for other similar shapes.

  • On the "Home" tab select "Templates" and then select "Circular Arc"
  • Modify the properties of the circular arc to match the image below and then click "OK"
Roundtorect 1

The circle of nodes generated by the template should now look like this:

Roundtorect 2

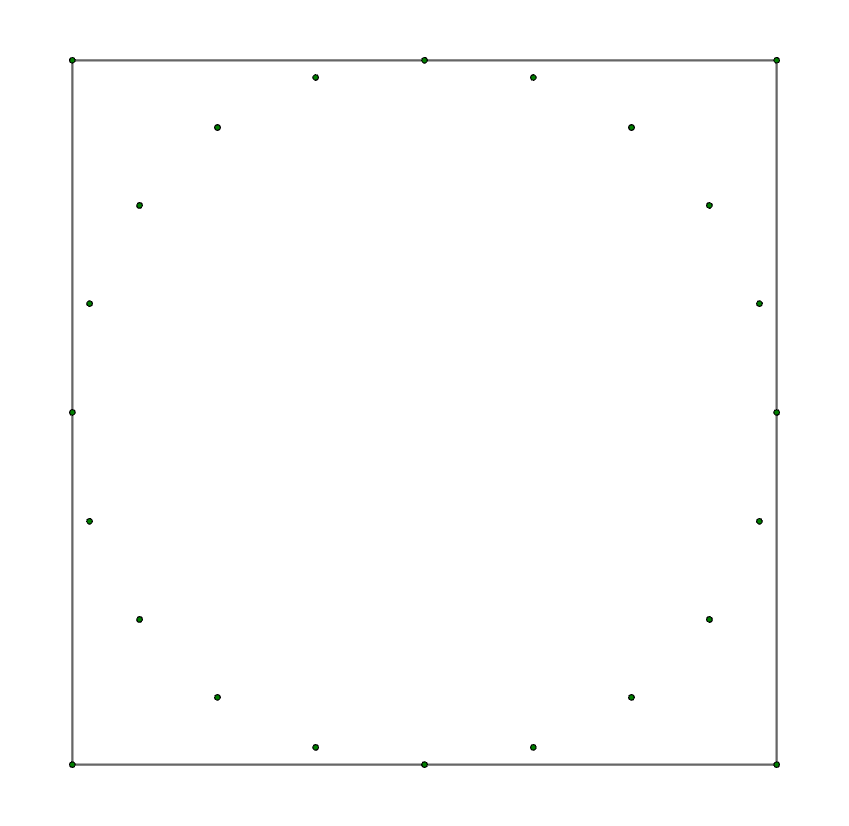
Next generate nodes in a square arrangement at a distance away from the circle equal to the required offset between the two sections.

  • Draw four members forming a square around the circle, as shown in the image below:
Roundtorect 3
  • With only the beams selected, click on the “Modify” tab and select “Global” from the "Move" section
  • Specify an offset distance of 10ft in the Z increment

Next, we can subdivide the members:

  • With only the beams selected, click on the “Modify” tab and select “Add Nodes” from the "Members" section
  • Select "Uniform" for the "Spacing Type" and choose "5" for the "Number of Segments"
  • When the nodes have been added, delete the members

Next, let's add the plates:

  • Snap to an ISO view and rotate such that none of the nodes overlap each other visibly and then draw a triangular plate between the top node on the circle and the top middle node of the square as shown below
Roundtorect 4
  • Continue drawing triangular plates until you have covered one quadarant (1/4) of the circle. Be careful to draw each plate in the same order (either clockwise or counter-clockwise, stay consistent)

Your model should now look like this:

Roundtorect 5
  • Select all of the plates, click on the “Modify” tab and select “Rotate” from the "Copy" section
  • Set the Properties of the "Copy Rotate" as shown in the image below:
Roundtorect 6

The plate transition is nearly done. The only remaining task is to submesh it for better results.

  • Select all of the plates, click on the "Modify" tab and select "Submesh Plates""
  • Select the "Triangular" mesh option from the Properties and click "Apply to Selected"

The completed model should now look like this:

Roundtorect 8


You may also be interested in

 
How to Apply a Tapered Load to Plates in RISA-3D
MAY 24, 2011

How to Apply a Tapered Load to Plates in RISA-3D

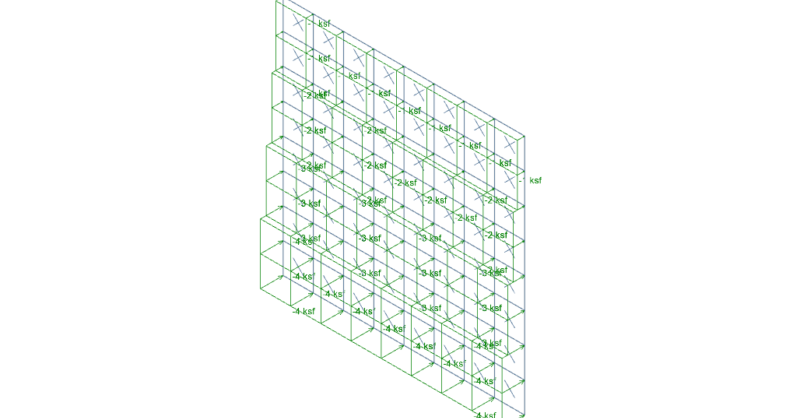
It’s easy to apply tapered surface loads to plates in RISA-3D by stepping up the loads from one level to the next.

Read More
Plate Contours Compared to Spreadsheet Values
MARCH 20, 2013

Plate Contours Compared to Spreadsheet Values

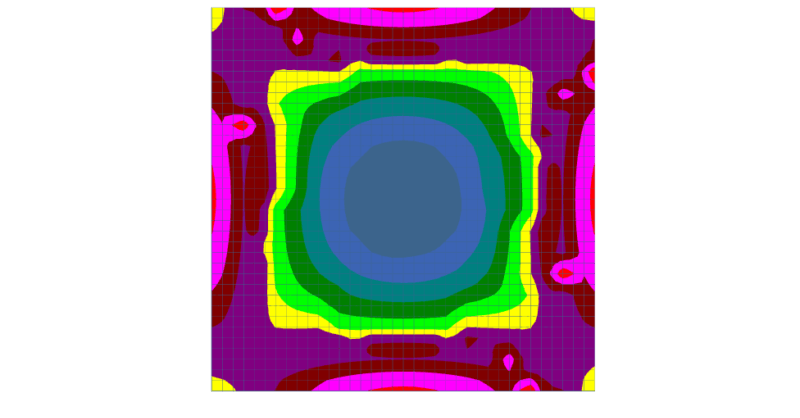
After solution in RISA-3D, you can use Results View Settings to view the Plate Contours graphically on your model.

Read More
How to Model a Hole in a Plate
JUNE 16, 2011

How to Model a Hole in a Plate

While RISA-3D (or RISA-2D) does not have an explicit tool to punch a hole in a plate, you can use the following steps to manually model them:

Read More