 By: Admin
How to Check Frame Story Shears in RISA-3D
When using rigid diaphragm analysis in RISA-3D it can be useful to evaluate the story shear in each frame. This is a perfect application for the...

Try the Complete RISA Suite for
10 Days FREE

RISA Education

Video Library

Online Help

Get Support

About Us
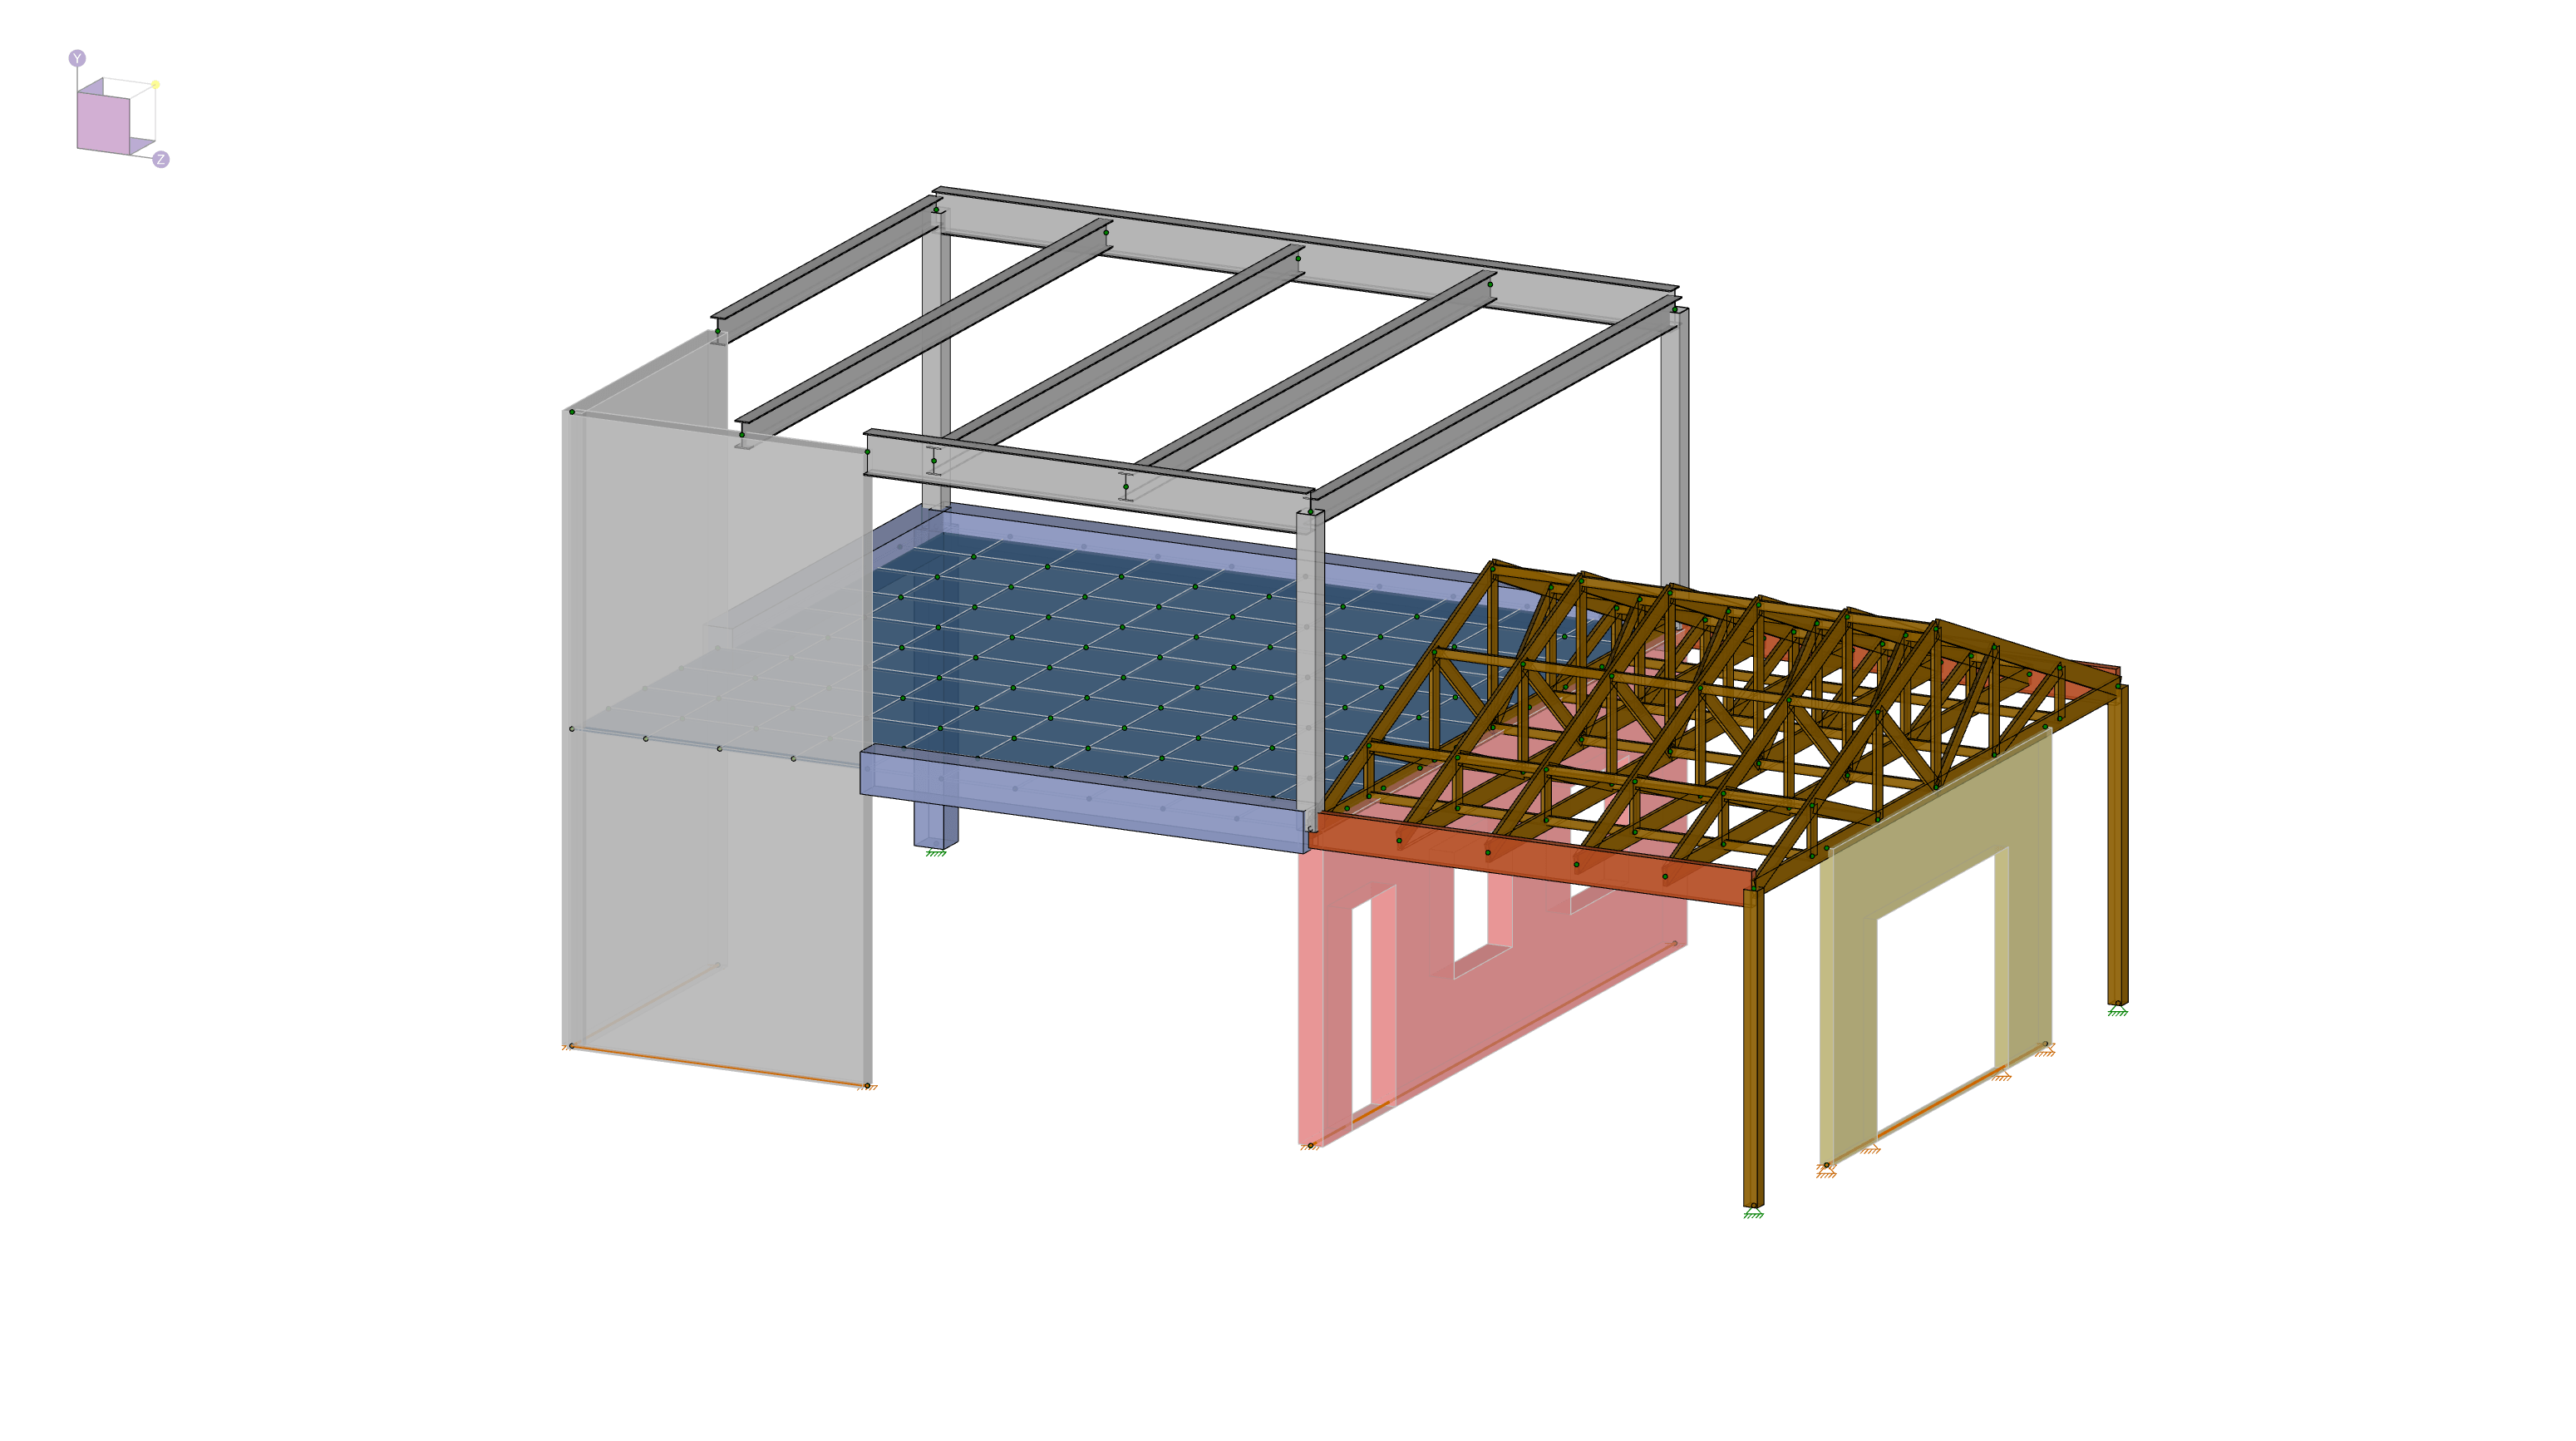
The Internal Force Summation Tool has the ability to "cut through" elements in the model and produce a summation of forces that corresponds with a given load combination. For this example, we will use the following model and review the summation of forces in the horizontal concrete plates.
First, click on the 'Select Elements by Property' button and once the dialogue opens, choose the 'Plates' tab.
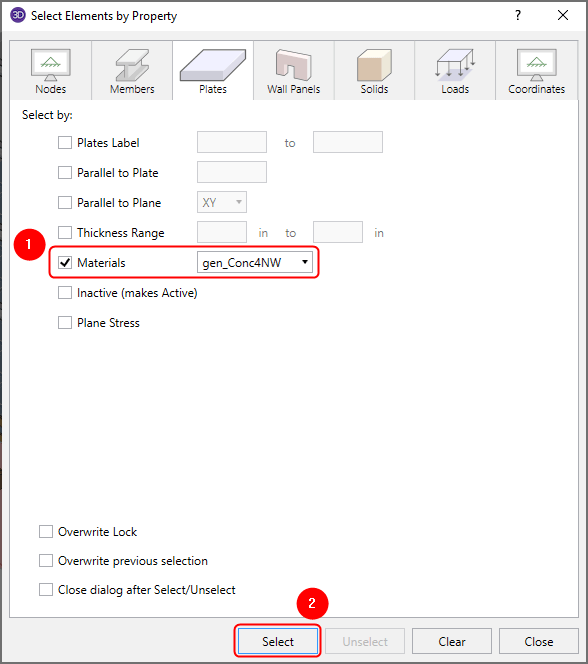
With the dialogue open, enable the checkbox for 'Materials' and select 'gen_ConcNW'. Then click 'Select' to graphically select all the concrete plates.
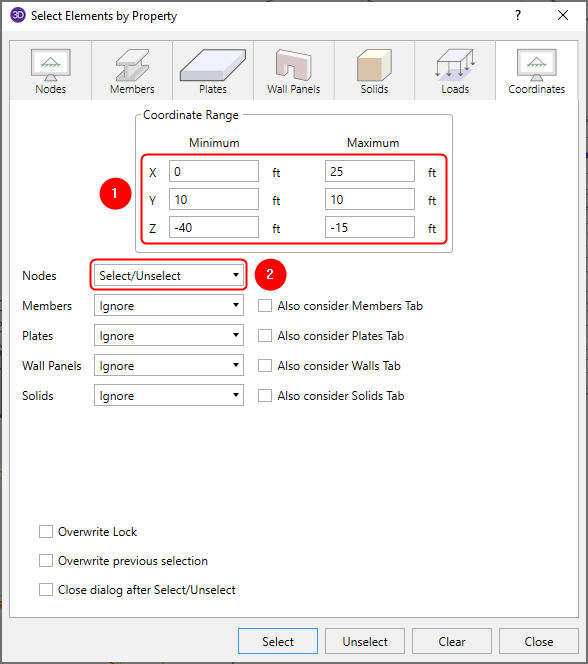
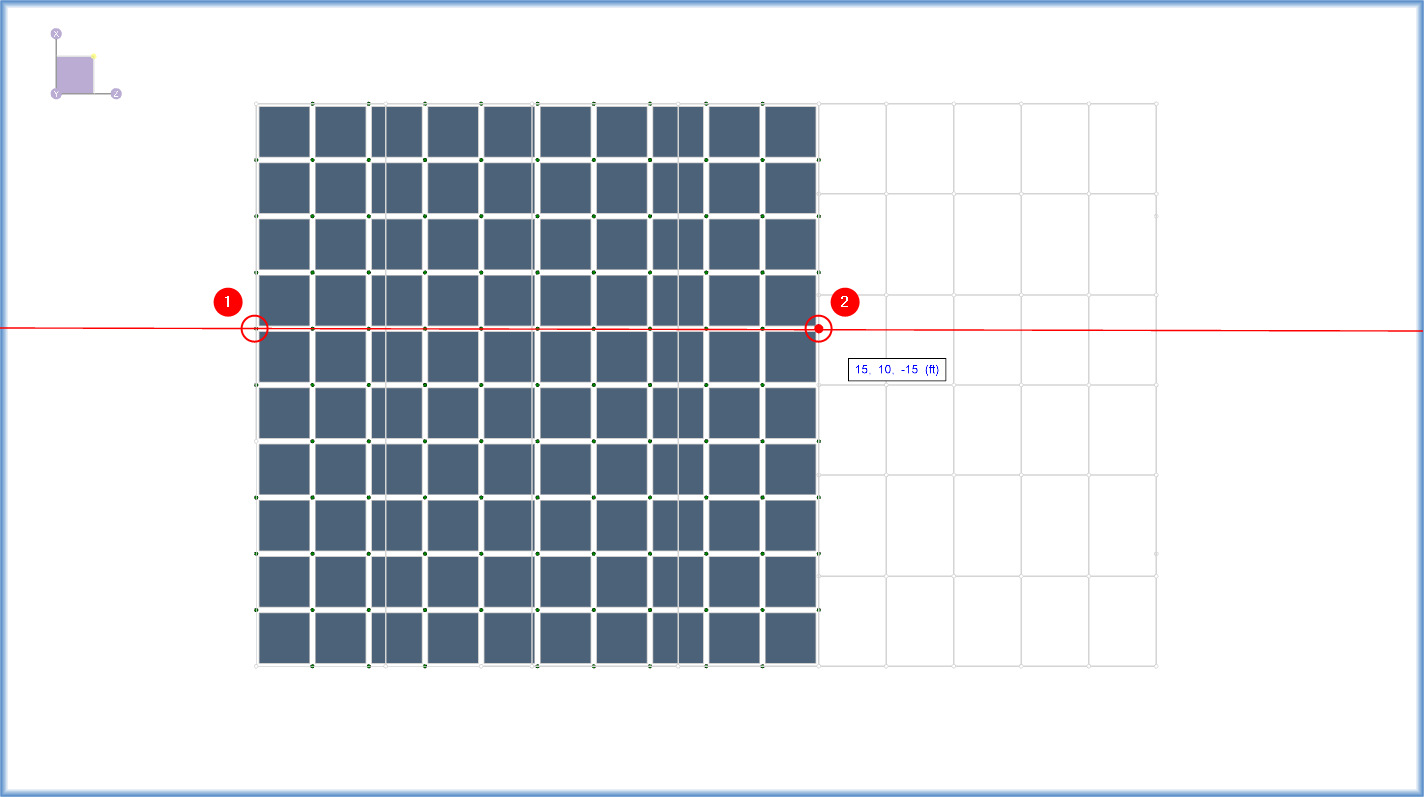
With the concrete plates selected, click on the 'Coordinates' tab and input the Coordinate range as shown in the image below along with choosing 'Select/Unselect' from the 'Nodes' drop-down box. The click 'Select' to graphically select the nodes based on the defined selection criteria.
With the concrete plates and nodes selected graphically, click 'Close'. Next, click the 'Dim Lock' button found on the 'Selection Toolbar' in order to lock and dim all unselected parts of the model.

Your model should now look like this:

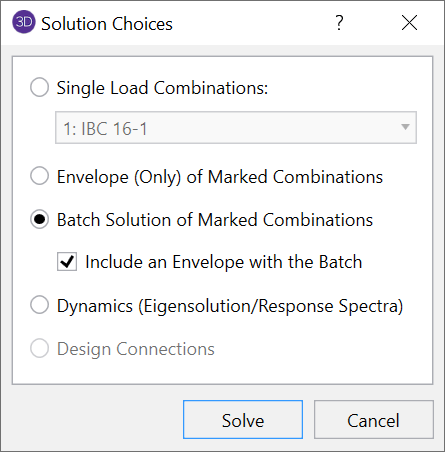
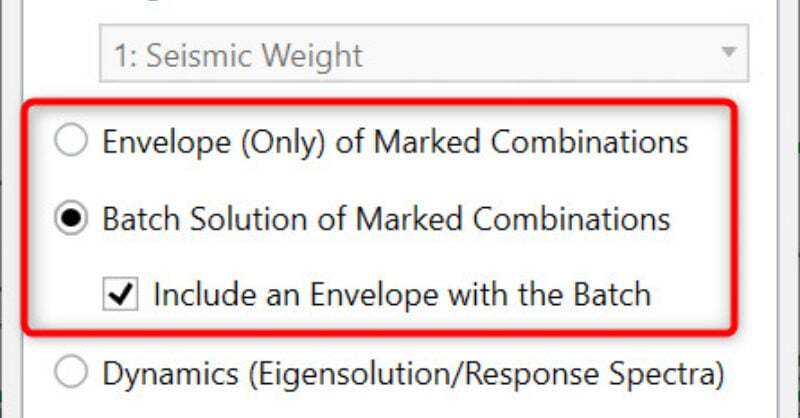
With the appropriate elements selected, solve either a single combination or a batch solution.
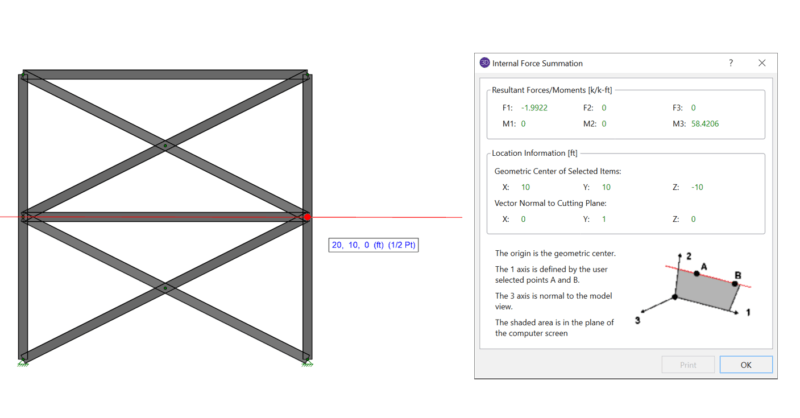
After the solution is complete, click on the 'XZ' view button found on the View Toolbar in order to see the model in plan view.

Next, select the Internal Force Summation Tool from the 'Selection Toolbar' on the left side of the 3D window.

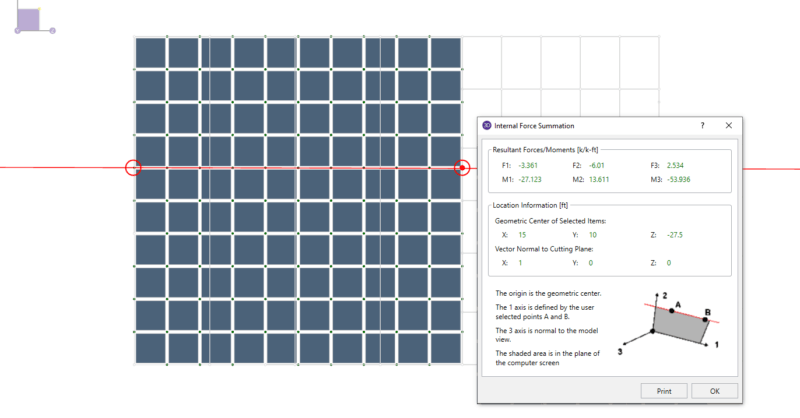
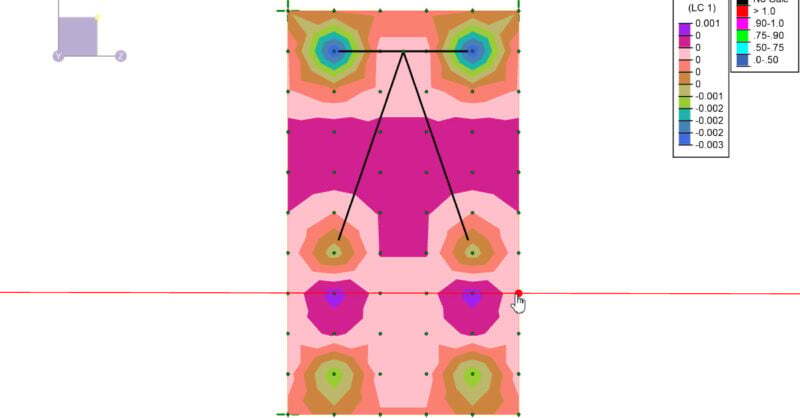
To define the cutting plane, first select the node at coordinate (15, 10, -40) and then click on the node at coordinate (15, 10, -15) twice. This will define the end of the cutting plane as well as lock the cutting plane to that exact location.
Note: The Internal Force Summation Tool uses a new axis so it's important to view your model in the Plan or Elevation View to get accurate results.
After making the 3rd click, the Internal Force Summation results dialog will appear. The axes shown in the dialog correspond to the direction in which the cutting plan was selected with the "1" direction running along the line from Point 1 to Point 2.

When using rigid diaphragm analysis in RISA-3D it can be useful to evaluate the story shear in each frame. This is a perfect application for the...
RISA-3D v14 introduced envelope detail reports for all material members. This means that you can see the enveloped solution (force diagrams and...
A number of improvements have been made to solid elements in RISA-3D v19 allowing users enhanced flexibility in viewing input data as well as...