How to Import a Seismic Moment Connection into RISAConnection
Design for seismic connection detailing is now available in RISAConnection and you can use the connection rules within RISAFloor and RISA-3D to...

Try the Complete RISA Suite for
10 Days FREE

RISA Education

Video Library

Online Help

Get Support

About Us
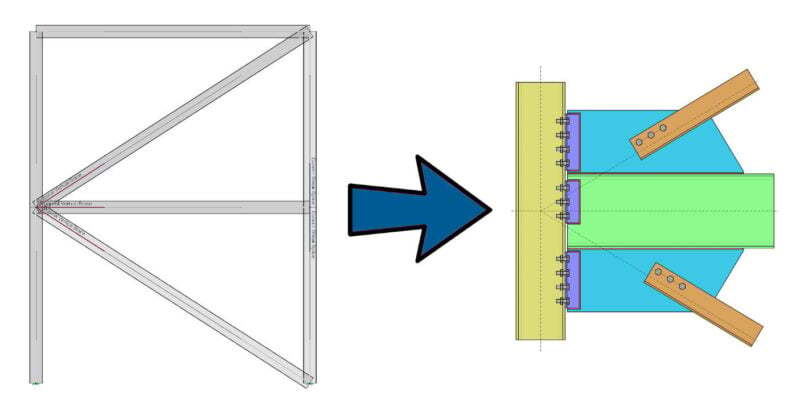
One of the advantages of the RISA Building System is the ability to utilize and share model information (geometry, loading, etc.) between software packages. One such way, is the ability to define hot-rolled steel connections in RISAFloor and/or RISA-3D and then transfer them to RISAConnection for design.
Once a model is created in RISAFloor/RISA-3D, users can assign connections and then transfer the connection to RISAConnection. During this process, the software will test whether the connection is valid based on the defined "Connection Rules". The proper definition of these "Connection Rules" is where many questions arise and understanding how this process will make steel connection design using RISA software a seamless process.
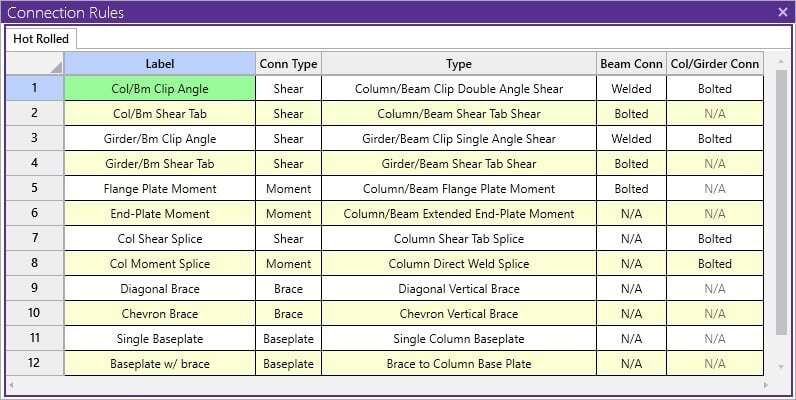
Users must define desired "Connection Rules" in the spreadsheet.
Once the "Connection Rules" are defined, the rules can be assigned to the appropriate member ends in the model.
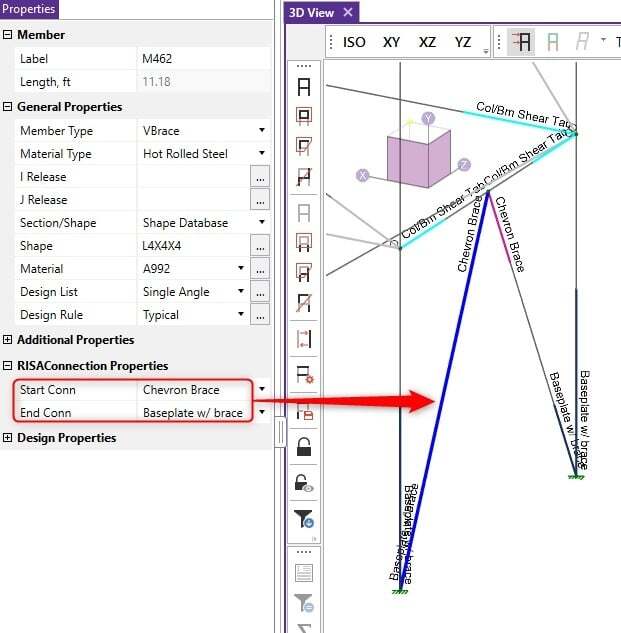
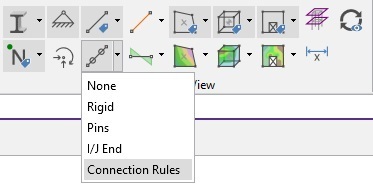
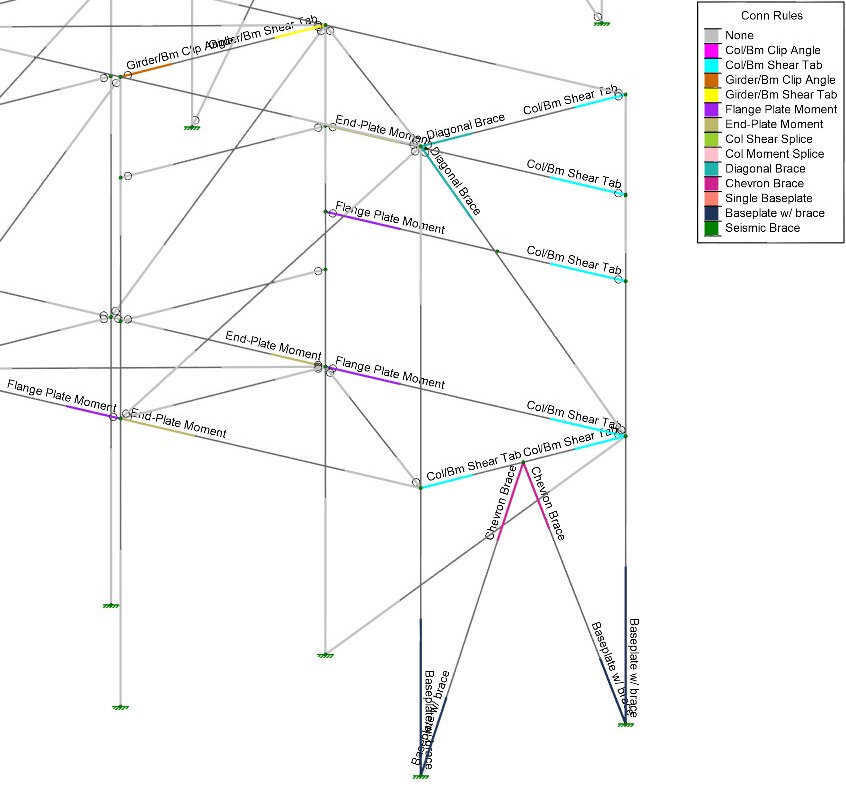
Use the Member Ends > Connection Rules button located on the "Quick View" toolbar to view the assigned connection rules (color coded) directly on the model. You can also use the Member Label > Connection Rules button to graphically display the connection name.
For specific information on assigning each of RISAConnection's eleven (11) available connection types, please review the supplemental articles listed below:
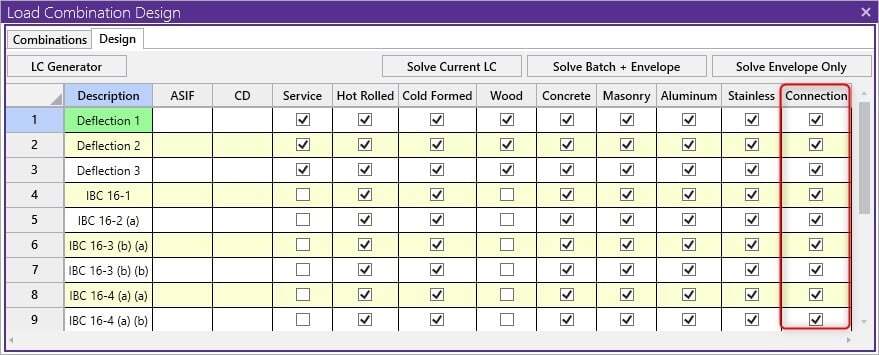
Once users have all of their "Connection Rules" properly assigned, the load combinations required for connection design must be defined.
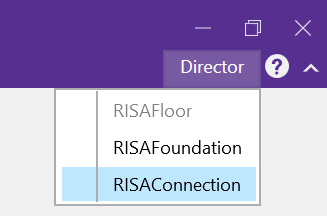
Finally, click "Solve - Batch or a Single Load Combination" to run the solution in RISA-3D and then use the Director - RISAConnection button to send the model to RISAConnection.
If RISA-3D identifies any invalid connection, users will receive an error message when attempting to transfer a model from RISA-3D to RISAConnection.
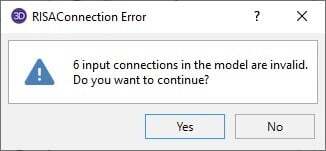
Note: Choosing "Yes" will launch RISAConnection and ignore all invalid connections.
If invalid connections are present, users can review the specific issues/error messages by opening the "Connection Results" spreadsheet.
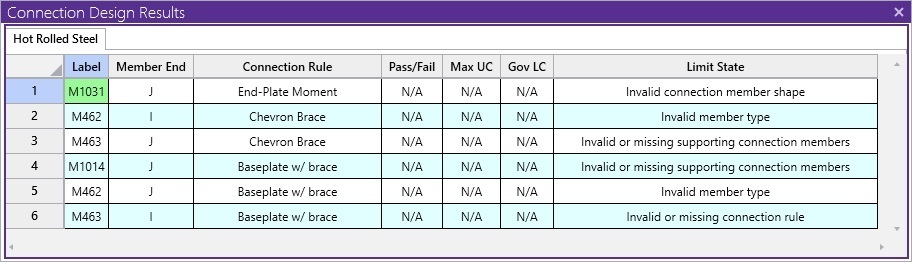
For all connections there are a few "golden rules" that users must follow to ensure that the connection defined won't be "invalid". These are as follows:
For Column/Beam connections the rule is assigned to the beam end but not the column.
For Girder/Beam connections the rule is assigned to the beam end but not the girder.
For Column/Beam/Brace connections the rule is assigned to the beam and brace(s) ends but not the column.
For Chevron Brace connections the rule is assigned to the brace ends but not the beam.
For Knee Brace connections the rule is assigned to the brace ends but not the supporting beam or column.
For Splice connections, the rule is assigned to both of the Column or Beam ends.
For more information, review the entire list of possible RISA-3D to RISAConnection integration error messages found in the RISA Help file by clicking the link below:
Design for seismic connection detailing is now available in RISAConnection and you can use the connection rules within RISAFloor and RISA-3D to...
Member Configuration The connection rule must be applied at the end of the beam (not the column).
Member Configuration The connection rule must be applied at the end of the beam (not the continuous girder).